E-commerce with Ory Part 2: Frontend example
Gain insight into how Amorevino integrated Ory Network identity schemas with their Firebase database and how Ory enables new business models going forward.
https://www.youtube.com/watch?v=VKLXbrZS7tU
In this tutorial, we will use one of the most popular frameworks for developing cross-platform applications - Flutter. For authentication, we will use Ory Kratos as well as the backend app mentioned in the first part of this blog post. What is also an important part is an Ory Network project, which will provide us with Ory Kratos Public API.
There are a lot of solutions for state management in Flutter. I went for the BLoC design pattern, as I enjoy working with it, and it was also recommended by Google developers. If you are not familiar with this approach, please check its dart package bloc as well as bloc library documentation.
You can also clone the project with the code samples from GitHub.
The Project
This app is a showcase for authentication using Ory Kratos where users can create an account and log in.
First, create a flutter project.
We will use material UI for design, bloc, and flutter_bloc for the state
management, http to send API requests, equatable to differentiate between
objects of the same class, flutter_secure_storage to store a session token,
and flutter_dotenv to use our environment variables. Add all these packages to
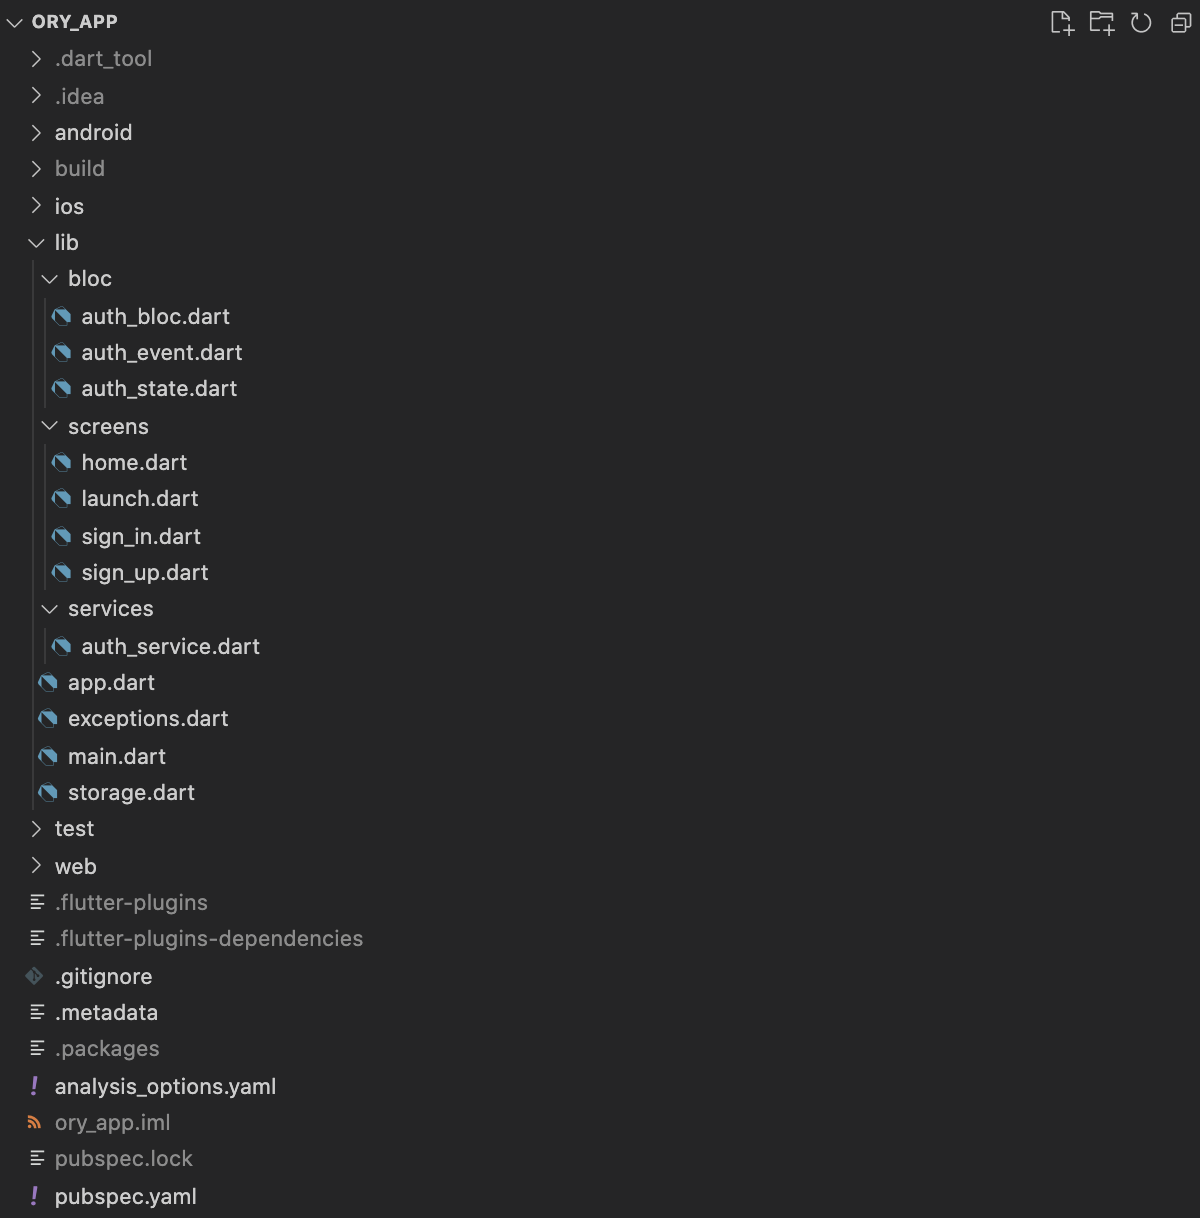
pubscpec.yaml file and get them. Here is a general code structure:
The next sections will explain how to
- Set up environment variables for Ory Kratos and our backend.
- Implement login functions.
- Implement complete login flow and get current user information.
- Run the app on an emulator.
Set up environment variables for Ory Kratos and our backend
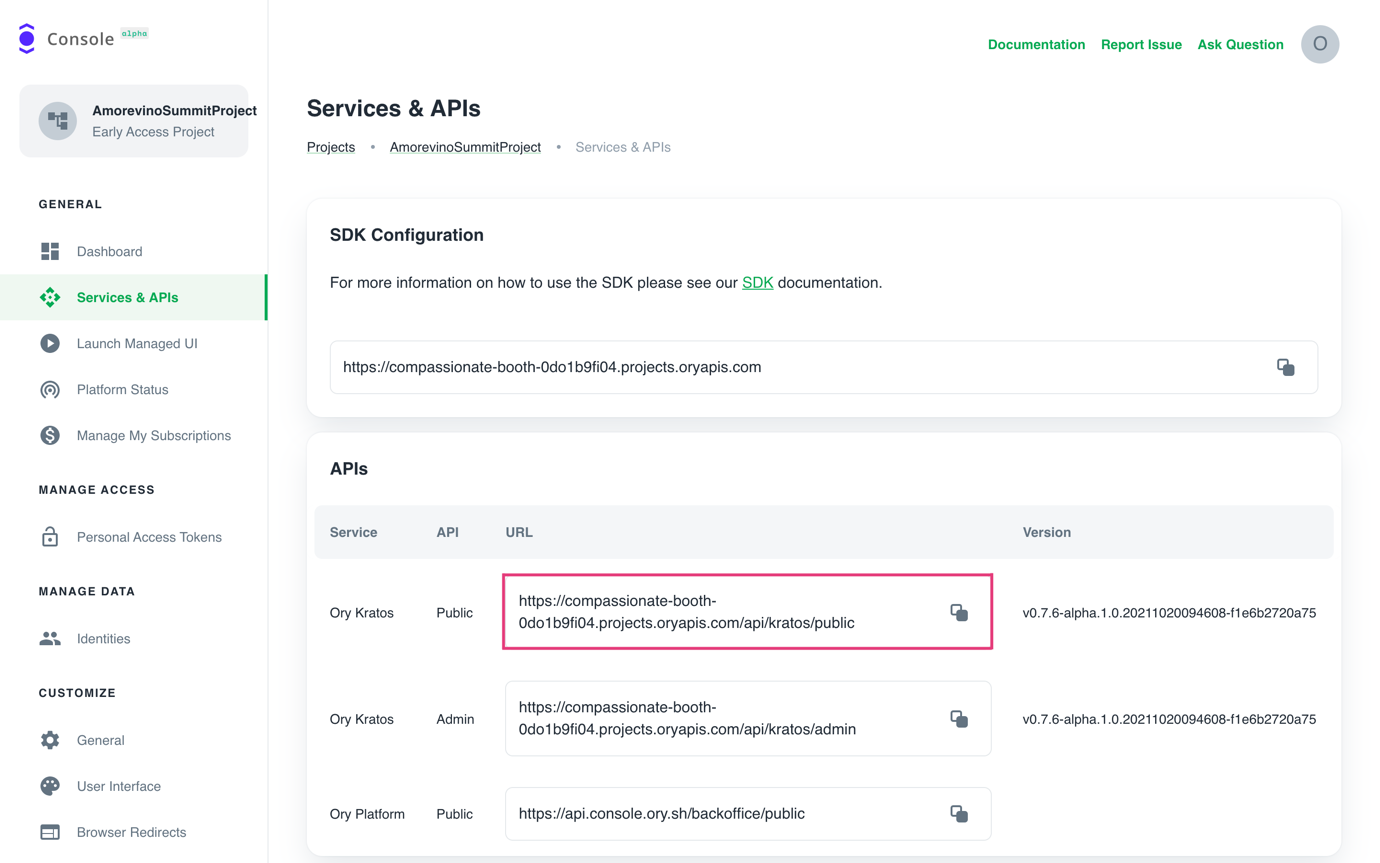
Ory provides its users with a simple and user-friendly console where they can manage their projects. It also supports other functionalities like customizing identity schema, managing identities, and browser redirects. Assuming you have already completed part 1 and created an Ory Network project, you'll find all APIs under the Services & APIs section. Copy Ory Kratos Public API URL:
Then create a .env file in a root directory of the project and add two variables:
- KRATOS_API="your Ory Kratos Public API URL"
- BACKEND="your backend URL" (from the first post)
It is also important to remember to add this .env file to the assets in
pubspec.yaml file, otherwise it won’t be found during compilation. With all
installed packages, your dependencies and flutter specific section in
pubspec.yaml will look like this:
dependencies:
  flutter:
    sdk: flutter
  flutter_bloc: ^7.3.1
  bloc: ^7.2.1
  equatable: ^2.0.3
  http: ^0.13.4
  flutter_secure_storage: ^4.2.1
  flutter_dotenv: ^5.0.2

  # The following adds the Cupertino Icons font to your application.
  # Use with the CupertinoIcons class for iOS style icons.
  cupertino_icons: ^1.0.2

dev_dependencies:
  flutter_test:
    sdk: flutter

  # The "flutter_lints" package below contains a set of recommended lints to
  # encourage good coding practices. The lint set provided by the package is
  # activated in the `analysis_options.yaml` file located at the root of your
  # package. See that file for information about deactivating specific lint
  # rules and activating additional ones.
  flutter_lints: ^1.0.0

# For information on the generic Dart part of this file, see the
# following page: https://dart.dev/tools/pub/pubspec

# The following section is specific to Flutter.
flutter:
  # The following line ensures that the Material Icons font is
  # included with your application, so that you can use the icons in
  # the material Icons class.
  uses-material-design: true

  # To add assets to your application, add an assets section, like this:
  assets:
    - .env
To load the .env file with dotenv package, add the following code line to the
main() function of the app:
await dotenv.load(fileName: ".env");
As you can see, it is quite easy to set up. Now let's move to the implementation part.
Implement login functions
To perform a login, we need to dispatch the InitLogitFLow() event and the
AuthBloc will handle it. This is the implementation of that button:
 child: ElevatedButton(
   onPressed: () => authBloc.add(SignIn(
       authState.flowId,
       authState.email, authState.password)),
   child: const Text("Sign in"),
 ),
There are several steps necessary to complete a login. First of all, we need to initiate login flow to enable login using Ory Kratos. This ensures that pre-login hooks run and more. This is done when our app launches or the user chooses the sign-in option from the SignUp screen. Here is the code for that:
  Future<String> initiateLoginFlow() async {
    var response = await http
        .get(Uri.parse("$kratosURL/self-service/login/api?refresh=true"));
    if (response.statusCode == 200) {
      final data = jsonDecode(response.body);
      return data["id"]; //return login flow id
    } else if (response.statusCode == 400 || response.statusCode == 500) {
      final data = jsonDecode(response.body);
      final error = data["error"];
      throw UnknownException(error["message"]);
    } else {
      throw Exception();
    }
  }
In the code above, we:
- Initiate login flow
- retrieve login flow ID
- retrieve an error message if there is any and throw it.
After we successfully initiated the login flow, we can continue with the actual login. For that, we need a retrieved login flow ID. Here is a function that performs the login:
  Future<String> signIn(String flowId, String email, String password) async {
    var response = await http.post(
        Uri.parse("$kratosURL/self-service/login?flow=$flowId"),
        headers: <String, String>{"Content-Type": "application/json"},
        body: jsonEncode(<String, String>{
          "method": "password",
          "password": password,
          "password_identifier": email
        }));

    if (response.statusCode == 200) {
      final data = jsonDecode(response.body);
      final String sessionToken = data["session_token"];
      return sessionToken;
    } else if (response.statusCode == 400) {
      final data = jsonDecode(response.body);
      final errors = checkForErrors(data);
      throw InvalidCredentialsException(errors);
    } else if (response.statusCode == 500) {
      final data = jsonDecode(response.body);
      final error = data["error"];
      throw UnknownException(error["message"]);
    } else if (response.statusCode == 422) {
      final data = jsonDecode(response.body);
      final error = data["message"];
      throw UnknownException(error);
    } else {
      throw Exception();
    }
  }
In the code above, we:
- perform login using retrieved flow ID and provided by using email and password
- After the user is successfully logged in, his session token is retrieved from Ory Kratos and returned
- If there are form validation errors, they are examined and an InvalidCredentialsException is thrown with those errors as its property
- If there are any other errors, we extract its message from the response and throw a corresponding error
Now we have all the functions needed to implement a complete login flow, so let's jump to the next section.
Implement complete login flow and get current user information
After the user has logged in, we want to display his user-specific information like session token, an ID that Ory Kratos assigned them, and an email address that was used for the registration. Here is a code that retrieves all that information:
  Future<Map<String, dynamic>> getCurrentSession(String token) async {
    final response = await http.get(
      Uri.parse("$backendURL/whoami"),
      headers: <String, String>{
        "Accept": "application/json",
        "Session_token": token
      },
    );

    if (response.statusCode == 200) {
      final userData = jsonDecode(response.body);
      return Map<String, dynamic>.from(userData["oryUser"]);
    } else if (response.statusCode == 401) {
      throw UnauthorizedException();
    } else if(response.statusCode == 403 || response.statusCode == 500) {
      final data = jsonDecode(response.body);
      final error = data["error"];
      throw UnknownException(error["message"]);
      }else {
      throw Exception();
    }
  }
In the code above, we:
- request user information from our backend specifying his session token.
- return oryUser from the JSON response, if it was successful.
- throw an error if the backend response contains it.
The very last step is to wrap up all those functions excluding initiating login flow into a stream, which will provide us with all necessary data. Here is a stream that implements the whole login flow and retrieves user information:
  Stream<AuthState> _signIn(SignIn event) async* {
    try {
      yield AuthLoading();
      final sessionToken =
          await authService.signIn(event.flowId, event.email, event.password);
      await secureStorage.persistToken(sessionToken);
      yield* getCurrentSession(sessionToken);
    } on InvalidCredentialsException catch (e) {
      yield AuthLoginInitialized(
          flowId: event.flowId,
          email: event.email,
          emailError: e.errors["traits.email"] ?? "",
          password: event.password,
          passwordError: e.errors["password"] ?? "",
          generalError: e.errors["general"] ?? "");
    } on UnknownException catch (e) {
      yield AuthLoginInitialized(
          flowId: event.flowId,
          email: event.email,
          password: event.password,
          message: e.message);
    } on UnauthorizedException catch (_) {
      await secureStorage.deleteToken();
      yield const AuthUnauthenticated("Your session expired. Please sign in.");
    } catch (_) {
      yield AuthLoginInitialized(
          flowId: event.flowId,
          email: event.email,
          password: event.password,
          message: "An error occurred. Please try again later.");
    }
  }
The code above does the following:
- log in user and retrieve a session token.
When the user is successfully logged in, his returned session token must be stored on the device. This is necessary for performing user-specific requests on the backend and Ory Kratos, e.g retrieving current session information or logging out. Here is where Secure Storage comes to help. get current session information. If there is any error, it is handled depending on its type.
The registration part is implemented in the same way.
That's it! Now you have a simple app that provides a user with a register/login functionality using Flutter and Ory Kratos.
Running the app on an emulator
There are a few prerequisites to fulfill to run the app on an Android emulator. Please keep in mind that this app is intended only for Android devices. I recorded a short setup video for you in case you haven't set up your environment yet. Please complete the following steps before watching the tutorial:
- clone fluffer repository
- fork ory showcase app repository
- install android studio
https://www.youtube.com/watch?v=VKLXbrZS7tU
Conclusion
As you have already noticed, Ory Kratos is a great SSO solution that is easy to integrate and work with. It also provides developers with security and flexibility which is one of the reasons why I decided to create this simple app. I hope this blog post gave you a basic understanding of how to build a simple mobile app using Flutter and Ory Kratos and you found this article interesting and helpful. All source code is available on GitHub.
Further reading

The future of Identity: How Ory and Cockroach Labs are building infrastructure for agentic AI

Ory and Cockroach Labs announce partnership to deliver the distributed identity and access management infrastructure required for modern identity needs and securing AI agents at global scale.

Ory + MCP: How to secure your MCP servers with OAuth2.1

Learn how to implement secure MCP servers with Ory and OAuth 2.1 in this step-by-step guide. Protect your AI agents against unauthorized access while enabling standardized interactions.