Run Ory Hydra in Docker
The goal of this chapter is to introduce you to a fully functional set up that includes Ory Hydra as well as our User Login & Consent Provider reference implementation.
The goal of this section is to familiarize you with the specifics of setting up Ory Hydra in your environment. Before starting with this section, please check out the tutorial. It will teach you the most important flows and settings for Hydra.
This guide will:
- Download and run a PostgreSQL container in Docker.
- Download and run Ory Hydra in Docker.
- Download and run our reference User Login & Consent Provider.
- Create an OAuth 2.0 Client to perform the OAuth 2.0 Authorize Code Flow.
- Perform the OAuth 2.0 Authorize Code flow.
Before starting with this guide, please install the most recent version of Docker. While docker is not required for running Ory Hydra, we recommend using it for this tutorial as it will greatly reduce the complexity of setting up a database on your system without virtualization, installing Go, and compiling Ory Hydra.
Create a Network
Before we can start, a network must be created which we will attach all our Docker containers to. That way, the containers can talk to one another.
docker network create hydraguide
Deploy PostgreSQL
For the purpose of this tutorial, we will use PostgreSQL as a database. As you probably already know, don't run databases in Docker in production! For the sake of this tutorial however, let's use Docker to quickly deploy the database.
docker run \
  --network hydraguide \
  --name ory-hydra-example--postgres \
  -e POSTGRES_USER=hydra \
  -e POSTGRES_PASSWORD=secret \
  -e POSTGRES_DB=hydra \
  -d postgres:9.6
This command will start a postgres instance with name ory-hydra-example--postgres, set up a database called hydra and create a
user hydra with password secret.
Deploy Ory Hydra
We highly recommend using Docker to run Hydra, as installing, configuring and running Hydra is easiest with Docker. Ory Hydra is available on Docker Hub.
This example remaps standard hydra ports 4444 to 5444 and 4445 to 5445 to prevent conflicts with a locally running hydra
server.
# The system secret can only be set against a fresh database. Key rotation is not supported. This
# secret is used to encrypt the database and needs to be set to the same value every time the process (re-)starts.
# You can use /dev/urandom to generate a secret. But make sure that the secret must be the same anytime you define it.
# You could, for example, store the value somewhere.
export SECRETS_SYSTEM=$(export LC_CTYPE=C; cat /dev/urandom | tr -dc 'a-zA-Z0-9' | fold -w 32 | head -n 1)
#
# Alternatively you can obviously just set a secret:
# export SECRETS_SYSTEM=this_needs_to_be_the_same_always_and_also_very_$3cuR3-._

# The database url points us at the postgres instance. This could also be an ephemeral in-memory database (`export DSN=memory`)
# or a MySQL URI.
export DSN=postgres://hydra:secret@ory-hydra-example--postgres:5432/hydra?sslmode=disable

# Before starting, let's pull the latest Ory Hydra tag from docker.
docker pull oryd/hydra:v1.10.6

# This command will show you all the environment variables that you can set. Read this with care.
# It's the equivalent to `hydra help serve`.
docker run -it --rm --entrypoint hydra oryd/hydra:v1.10.6 help serve

Starts all HTTP/2 APIs and connects to a database backend.
[...]

# Ory Hydra doesn't do magic, it requires conscious decisions, for example running SQL migrations which is required
# when installing a new version of Ory Hydra, or upgrading an existing installation.
# It's the equivalent to `hydra migrate sql --yes postgres://hydra:secret@ory-hydra-example--postgres:5432/hydra?sslmode=disable`
docker run -it --rm \
  --network hydraguide \
  oryd/hydra:v1.10.6 \
  migrate sql --yes $DSN

Applying `client` SQL migrations...
[...]
Migration successful!

# Let's run the server (settings explained below):
docker run -d \
  --name ory-hydra-example--hydra \
  --network hydraguide \
  -p 5444:4444 \
  -p 5445:4445 \
  -e SECRETS_SYSTEM=$SECRETS_SYSTEM \
  -e DSN=$DSN \
  -e URLS_SELF_ISSUER=https://localhost:5444/ \
  -e URLS_CONSENT=http://localhost:9020/consent \
  -e URLS_LOGIN=http://localhost:9020/login \
  oryd/hydra:v1.10.6 serve all

# And check if it's running:
docker logs ory-hydra-example--hydra

time=2022-04-13T11:27:32Z level=info msg=No tracer configured - skipping tracing setup audience=application service_name=ORY Hydra service_version=v1.10.6
time=2022-04-13T11:27:32Z level=warning msg=JSON Web Key Set "hydra.openid.id-token" does not exist yet, generating new key pair... audience=application service_name=ORY Hydra service_version=v1.10.6
[...]
time=2022-04-13T11:28:07Z level=warning msg=JSON Web Key Set "hydra.https-tls" does not exist yet, generating new key pair... audience=application service_name=ORY Hydra service_version=v1.10.6
time=2022-04-13T11:28:19Z level=info msg=Setting up http server on :4444 audience=application service_name=ORY Hydra service_version=v1.10.6
time=2022-04-13T11:28:19Z level=info msg=Setting up http server on :4445 audience=application service_name=ORY Hydra service_version=v1.10.6
Let's dive into the various settings:
--network hydraguideconnects this instance to the network and makes it possible to connect to the PostgreSQL database.-p 5444:4444exposes Ory Hydra's public API onhttps://localhost:5444/.-p 5445:4445exposes Ory Hydra's administrative API onhttps://localhost:5445/.-e SECRETS_SYSTEM=$SECRETS_SYSTEMsets the system secret environment variable (required).-e DSN=$DSNsets the database url environment variable (required).-e URLS_SELF_ISSUER=https://localhost:5444/this value must be set to the publicly available URL of Ory Hydra (required).-e URLS_CONSENT=http://localhost:9020/consentthis sets the URL of the consent provider (required). We will set up the service that handles requests at that URL in the next sections.-e URLS_LOGIN=http://localhost:9020/loginthis sets the URL of the login provider (required). We will set up the service that handles requests at that URL in the next sections.
In this example we didn't define a value for the optional setting URLS_ERROR. This URL can be used to provide an endpoint which
will receive error messages from Ory Hydra that should be displayed to the end user. The URL receives error and
error_description parameters. If this value isn't set, Hydra uses the fallback endpoint /oauth2/fallbacks/error and displays a
default error message. In order to obtain a uniform UI, you might want to include such an endpoint in your login or consent
provider.
We only used environmental variables to configure Ory Hydra in this example. If you use a configuration file instead, remember to mount it in the container. For example:
docker run -d \
  -v $(pwd)/hydra.yaml:/hydra.yaml \
  oryd/hydra:v1.10.6 serve all --config /hydra.yaml
To confirm that the instance is running properly, open the health check. If asked, accept
the self-signed certificate in your browser. You should simply see ok.
On start up, Ory Hydra is initializing some values. Let's take a look at the logs:
docker logs ory-hydra-example--hydra
time=2022-04-13T11:27:32Z level=info msg=No tracer configured - skipping tracing setup audience=application service_name=ORY Hydra service_version=v1.10.6
time=2022-04-13T11:27:32Z level=warning msg=JSON Web Key Set "hydra.openid.id-token" does not exist yet, generating new key pair... audience=application service_name=ORY Hydra service_version=v1.10.6
[...]
time=2022-04-13T11:28:07Z level=warning msg=JSON Web Key Set "hydra.https-tls" does not exist yet, generating new key pair... audience=application service_name=ORY Hydra service_version=v1.10.6
time=2022-04-13T11:28:19Z level=info msg=Setting up http server on :4444 audience=application service_name=ORY Hydra service_version=v1.10.6
time=2022-04-13T11:28:19Z level=info msg=Setting up http server on :4445 audience=application service_name=ORY Hydra service_version=v1.10.6
As you can see, the following steps are performed when running Ory Hydra against a fresh database:
- If no system secret was given (in our case we provided one), a random one is generated and emitted to the logs. Note this down, otherwise you won't be able to restart Hydra.
- Cryptographic keys are generated for the OpenID Connect ID Token, the consent challenge and response, and TLS encryption using
a self-signed certificate, which is why we need to run all commands using
--skip-tls-verify.
Ory Hydra can be managed using the Hydra Command Line Interface (CLI), which is using Ory Hydra's REST APIs. To see the available commands, run:
docker run --rm -it --entrypoint hydra oryd/hydra:v1.10.6 help
Hydra is a cloud native high throughput OAuth2 and OpenID Connect provider

Usage:
  hydra [command]

[...]
Deploy Login & Consent App
The Login Provider and Consent Provider can be two separate web services. We provide a reference implementation which combines both features in one app. Here, we will use deploy that app using Docker.
docker pull oryd/hydra-login-consent-node:v1.10.6
docker run -d \
  --name ory-hydra-example--consent \
  -p 9020:3000 \
  --network hydraguide \
  -e HYDRA_ADMIN_URL=https://ory-hydra-example--hydra:4445 \
  -e NODE_TLS_REJECT_UNAUTHORIZED=0 \
  oryd/hydra-login-consent-node:v1.10.6

# Let's check if it's running ok:
docker logs ory-hydra-example--consent

> hydra-login-consent-logout@0.0.0 serve /usr/src/app
> node lib/app.js

Listening on http://0.0.0.0:3000
Let's take a look at the arguments:
-p 9020:3000exposes this service at port 9020. If you remember, that's the port of theURLS_CONSENTandURLS_LOGINvalue from the Ory Hydra docker container (URLS_CONSENT=http://localhost:9020/consent,URLS_LOGIN=http://localhost:9020/login).HYDRA_ADMIN_URL=http://hydra:4445point to the Ory Hydra Administrative API.NODE_TLS_REJECT_UNAUTHORIZED=0disables TLS verification, because we're using self-signed certificates.
Perform OAuth 2.0 Flow
Great! Our infrastructure is all set up! Next it's time to perform the OAuth 2.0 Authorize Code flow. For that purpose, the Ory Hydra CLI has a feature that sets up an OAuth 2.0 Consumer and an OAuth 2.0 callback URL. Typically, this would be a third-party application that requests access to a user's resources on your servers - for example a Facebook App you wrote that backs up a user's photos and thus requires read access to the user's photos.
Before we go ahead, the OAuth 2.0 Client that performs the request has to be set up. Let's call the client
facebook-photo-backup. We've to specify which OAuth 2.0 Grant Types, OAuth 2.0 Scope, OAuth 2.0 Response Types, and Callback
URLs the client may request:
docker run --rm -it \
  -e HYDRA_ADMIN_URL=https://ory-hydra-example--hydra:4445 \
  --network hydraguide \
  oryd/hydra:v1.10.6 \
  clients create --skip-tls-verify \
    --id facebook-photo-backup \
    --secret some-secret \
    --grant-types authorization_code,refresh_token,client_credentials,implicit \
    --response-types token,code,id_token \
    --scope openid,offline,photos.read \
    --callbacks http://127.0.0.1:9010/callback

Client facebook-photo-backup
Client Secret: some-secret
Let's dive into some of the arguments:
--skip-tls-verifyis supported by all management commands (create/delete/update/... OAuth 2.0 Client, JSON Web Key, ...) and tells the CLI to trust any certificate authority - even self-signed ones. We need this flag because the server uses a self-signed certificate. In production deployments, you would use a certificate signed by a trusted CA.--grant-types authorize_code,refresh_token,client_credentials,implicitwe want to be able to perform all of these OAuth 2.0 flows.--response-types token,code,id_tokenallows us to receive authorize codes, access and refresh tokens, and OpenID Connect ID Tokens.--scope openid,offline,photos.readallows the client to request various permissions:openidallows the client to perform the OpenID Connect flow and request an OpenID Connect ID Token.offlineallows the client to request a refresh token. Because we want to continuously backup photos, the app must be able to refresh expired access tokens. This scope allows that.photos.readthis is an imaginary scope that'sn't handled by Ory Hydra but serves the purpose of making it clear that we could request read access to a user's photos. You can obviously omit this scope or use your own scope.
--callbacks http://localhost:9010/callbackallows the client to request this redirect uri.
Perfect, let's perform an exemplary OAuth 2.0 Authorize Code Flow! To make this easy, the Ory Hydra CLI provides a helper command
called hydra perform authorization-code. Just imagine this being, for example, passport.js that's generating an auth code url,
redirecting the browser to it, and then exchanging the authorize code for an access token. The same thing happens with this
command:
docker run --rm -it \
  --network hydraguide \
  -p 9010:9010 \
  oryd/hydra:v1.10.6 \
  token user --skip-tls-verify \
    --port 9010 \
    --auth-url https://localhost:5444/oauth2/auth \
    --token-url https://ory-hydra-example--hydra:4444/oauth2/token \
    --client-id facebook-photo-backup \
    --client-secret some-secret \
    --scope openid,offline,photos.read

Setting up home route on http://127.0.0.1:9010/
Setting up callback listener on http://127.0.0.1:9010/callback
Press ctrl + c on Linux / Windows or cmd + c on OSX to end the process.
If your browser doesn't open automatically, navigate to:

        http://127.0.0.1:9010/
open the link, as prompted, in your browser, and follow the steps shown there. You might encounter a screen like the following one:
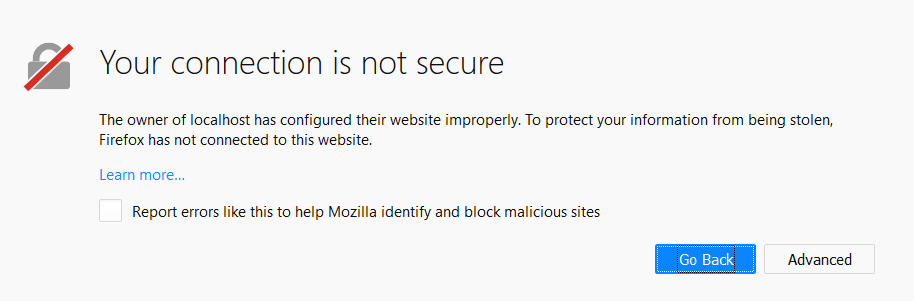
This happens because we run Ory Hydra with a self-signed TLS certificate. In production deployments, you would probably use a certificate signed by a trusted CA and not see this screen.
When you see this screen, click on "Advanced" and "Add Exception" to continue. In some browsers, this might work differently, but it's always possible to proceed.
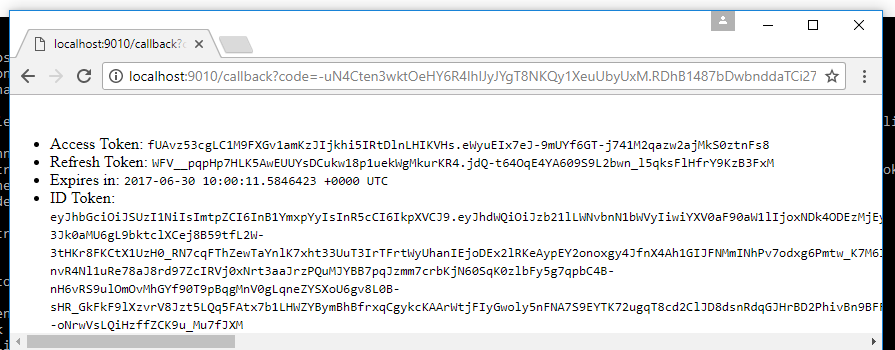
When completed, you should land at a screen that looks like this one: