Ory Kratos Identity Server Quickstart
Ory offers support for self-hosted Ory software through the Ory Enterprise License (OEL). Read more about the OEL here.
Ory Kratos has several moving parts and getting everything right from the beginning can be challenging. This getting started guide will help you install Ory Kratos and some additional dependencies so that you can see how it works.
Please be aware that this guide isn't a replacement for studying the docs. You must understand core concepts and APIs to use Ory Kratos productively. This is merely a guide to get you set up with some examples.
Use case: application login and registration
This section gives you some context on what we want to achieve and what tools we need for that. You will also learn about the network set up we picked for this guide.
This quickstart guide operates on the assumption that we're writing a Node.js app. This app is using nothing fancy - some Express.js and a bit of HTML Templating using Handlebars. We do want to use TypeScript, but only because it's more readable - not because we're doing anything out of the ordinary!
You could pick any technology here, of course. This works with Swift, React.js, or Angular (client side) as well as with PHP, Ruby, Python, Java (server side) - you name it! We picked Node.js + TypeScript because we believe it's the easiest to understand, and because JavaScript and Node.js are universally understood and easy to install.
We know our app will need to have some type of dashboard and that it needs users. Therefore, we need:
- Login
- Logout
- Registration
- Profile management ("update first name", "update avatar", etc.)
- Credentials Management ("add a new recovery email", "change password", etc.)
- Account Recovery ("password reset")
- Email Verification
- Two Factor Authentication
- "Sign in with Google" and "Sign in with GitHub"
and of course:
- A dashboard that shows
Hello {{ traits.name.first }} {{ traits.name.last }}!which is only visible when the user is signed in.
Setup
As you might already know, Ory Kratos is API-only; it doesn't have a UI or HTML templating engine. We will implement all the user-facing UIs like "dashboard", "login", and "registration" in our Node.js app!
To ensure that no one can access the dashboard without prior authentication (login), we can use a small piece of code (here Express.js) to do that:
Ory Kratos isn't just an API: it uses cookies, HTTP redirects, anti-CSRF tokens and more so you don't have to.
The Node.js app and Ory Kratos need to share cookies in order for anti-CSRF tokens and login sessions to work. Because the
quickstart runs on different ports on 127.0.0.1 there isn't anything we need to do to get this all working. In environments
where you have multiple sub-domains or reverse proxies, the set up will be a bit more sophisticated. You can find more information
about the different set up possibilities in the Getting Cookies to Work on Multi-Domains Guide.
Ory Kratos doesn't ship with an administrative user interface. You must implement that UI yourself. If you need a managed solution that takes care of everything, consider signing up to Ory Network.
In this quickstart we will use Ory Kratos' CLI to interact with Ory Kratos' APIs.
The quickstart also comes with MailSlurper, a mock SMTP server the demo uses to show how email verification works.
Clone Ory Kratos and run it in Docker
To get this example working, you will need Git, Docker, and Docker Compose installed on your system. No other dependencies are required. Before you start, make sure that Docker has enough disk space.
This tutorial uses Docker-Compose volumes which have reported to run out of disk space. Check the remaining disk space using
docker system df. If the volumes are above the 85% threshold,
prune old Docker objects before you start!
If you encounter build errors such as network timeout, make sure that the network is running and run make docker again. If the
problem persists, feel free to open an issue.
Let's clone Ory Kratos and run docker-compose:
git clone https://github.com/ory/kratos.git
cd kratos
git checkout <version-you-want>
docker-compose -f quickstart.yml -f quickstart-standalone.yml up --force-recreate
# If you have SELinux, run:
docker-compose -f quickstart.yml -f quickstart-selinux.yml -f quickstart-standalone.yml up --force-recreate
This might take a minute or two. Once the output slows down and logs indicate a healthy system you're ready to roll! A healthy system will show something along the lines of (the order of messages might be reversed):
kratos_1 | time="2020-01-20T14:52:13Z" level=info msg="Starting the admin httpd on: 0.0.0.0:4434"
kratos_1 | time="2020-01-20T14:52:13Z" level=info msg="Starting the public httpd on: 0.0.0.0:4433"
There are two important factors to get a fully functional system:
- You need to make sure that ports
4455,4433,4434, and4436are free. - Make sure to always use
127.0.0.1as the hostname; never uselocalhost! This is important because browsers treat these two as separate domains and will therefore have issues with setting and using cookies.
There is no database being used in this example. Ory Kratos supports SQLite, PostgreSQL, MySQL, and CockroachDB as database backends. For the quickstart, we're mounting a persistent volume to store the SQLite database in.
Future guides will explain how to set up a production system.
Network architecture
This demo makes use of several services:
- Ory Kratos
- Public ("Browser") API (port 4433)
- Admin API (port 4434) - This is only made public so we can test via the CLI.
- Node.js Selfservice UI
- Public (port 4455) - an example application written in Node.js that implements the login, registration, logout, dashboard, and other UIs.
- MailSlurper
- Public (port 4436) - a development SMTP server which Ory Kratos will use to send emails.
To better understand the application architecture, let's take a look at the network configuration. This assumes that you have at least some understanding of how Docker networks work:
Perform registration, login, and logout
Enough theory, it's time to get this thing going! Let's start by trying to open the dashboard - go to 127.0.0.1:4455/welcome.
You should end up at the dashboard:
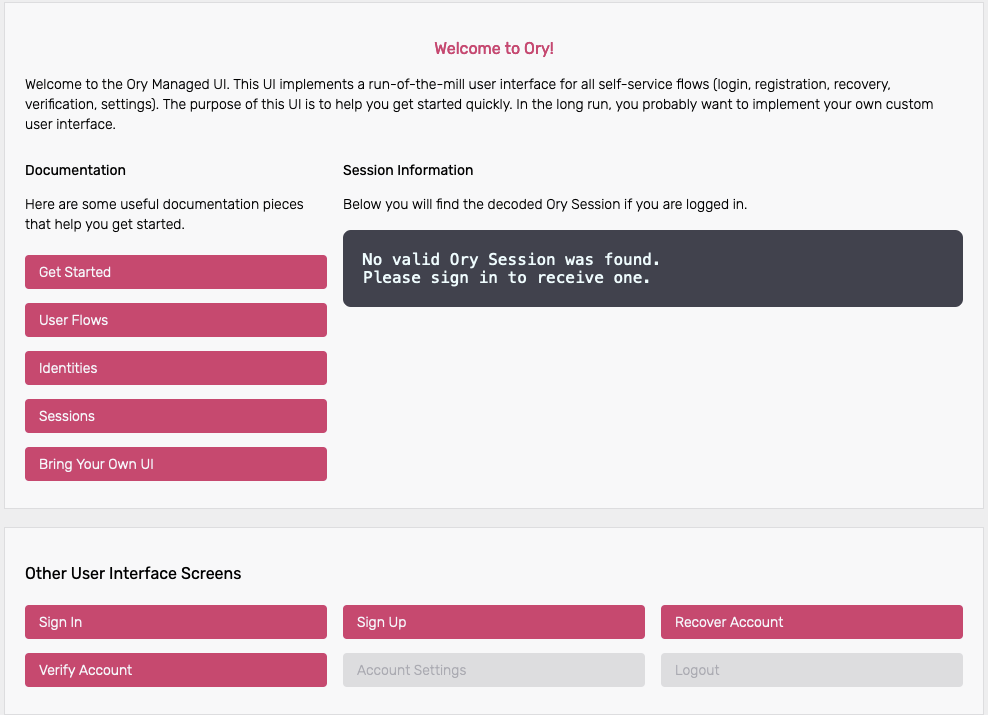
Under the section Session Information you can find the Ory Session details, as there is no active session this is empty for now.
The rendered login form should be a standard HTML <form>. AJAX requests require credentials: 'include'. This flow also works
with Single Page Apps (SPA) and frameworks like Angular or React.js.
Click Sign In to start a login flow. On the Sign In Screen you can see the unique login <flow_id> for example
?flow=78e374d2-f36b-40ae-922d-e81f812ea897 appended to the /login route in the URL.
Looking at the network stack, you can see two redirects happening:

Here's a play-by-play of what happened:
/loginredirected you tohttp://127.0.0.1:4433/self-service/login/browser, which is one of Ory Kratos' APIs used for logging in browser-based applications.- Kratos handled
/self-service/login/browserwhich created and persisted a new flow withcsrf_token. Kratos would check no session exists, redirected the browser to/login?flow=<flow_id>. If a session exists already, the browser will be redirected tourls.default_redirect_urlunless the query parameter?refresh=truewas set. - The login UI handled the
/loginroute, found the<flow_id>in the URL query parameter, and used it to make an HTTP request tohttp://kratos:4433/self-service/login/flows?id=<flow_id>. Notice the URI iskratos:4433because SecureApp is making a server-side HTTP request via Docker's private network to Ory Kratos' Admin API. - Ory Kratos responded with data which SecureApp used to render the HTML login form.
We can use curl to get an example of the payload that Ory Kratos responds with. GET a valid <flow_id> or copy it from your
browser and make a request to /self-service/login/:
flowId=$(curl -s -X GET \
    -H "Accept: application/json" \
    http://127.0.0.1:4433/self-service/login/api | jq -r '.id')
curl -s -X GET \
    -H "Accept: application/json" \
    "http://127.0.0.1:4433/self-service/login/flows?id=$flowId" | jq
{
  "id": "f091ccf5-df85-493e-a9a3-de9b86925a45",
  "type": "api",
  "expires_at": "2021-12-13T18:31:57.1189985Z",
  "issued_at": "2021-12-13T18:21:57.1189985Z",
  "request_url": "http://127.0.0.1:4433/self-service/login/api",
  "ui": {
    "action": "http://127.0.0.1:4433/self-service/login?flow=f091ccf5-df85-493e-a9a3-de9b86925a45",
    "method": "POST",
    "nodes": [
      {
        "type": "input",
        "group": "default",
        "attributes": {
          "name": "csrf_token",
          "type": "hidden",
          "value": "",
          "required": true,
          "disabled": false,
          "node_type": "input"
        },
        "messages": [],
        "meta": {}
      },
      {
        "type": "input",
        "group": "password",
        "attributes": {
          "name": "identifier",
          "type": "text",
          "value": "",
          "required": true,
          "disabled": false,
          "node_type": "input"
        },
        "messages": [],
        "meta": {
          "label": {
            "id": 1070004,
            "text": "ID",
            "type": "info"
          }
        }
      },
      {
        "type": "input",
        "group": "password",
        "attributes": {
          "name": "password",
          "type": "password",
          "required": true,
          "disabled": false,
          "node_type": "input"
        },
        "messages": [],
        "meta": {
          "label": {
            "id": 1070001,
            "text": "Password",
            "type": "info"
          }
        }
      },
      {
        "type": "input",
        "group": "password",
        "attributes": {
          "name": "method",
          "type": "submit",
          "value": "password",
          "disabled": false,
          "node_type": "input"
        },
        "messages": [],
        "meta": {
          "label": {
            "id": 1010001,
            "text": "Sign in",
            "type": "info",
            "context": {}
          }
        }
      }
    ]
  },
  "created_at": "2021-12-13T18:21:57.121894Z",
  "updated_at": "2021-12-13T18:21:57.121894Z",
  "refresh": false,
  "requested_aal": "aal1"
}
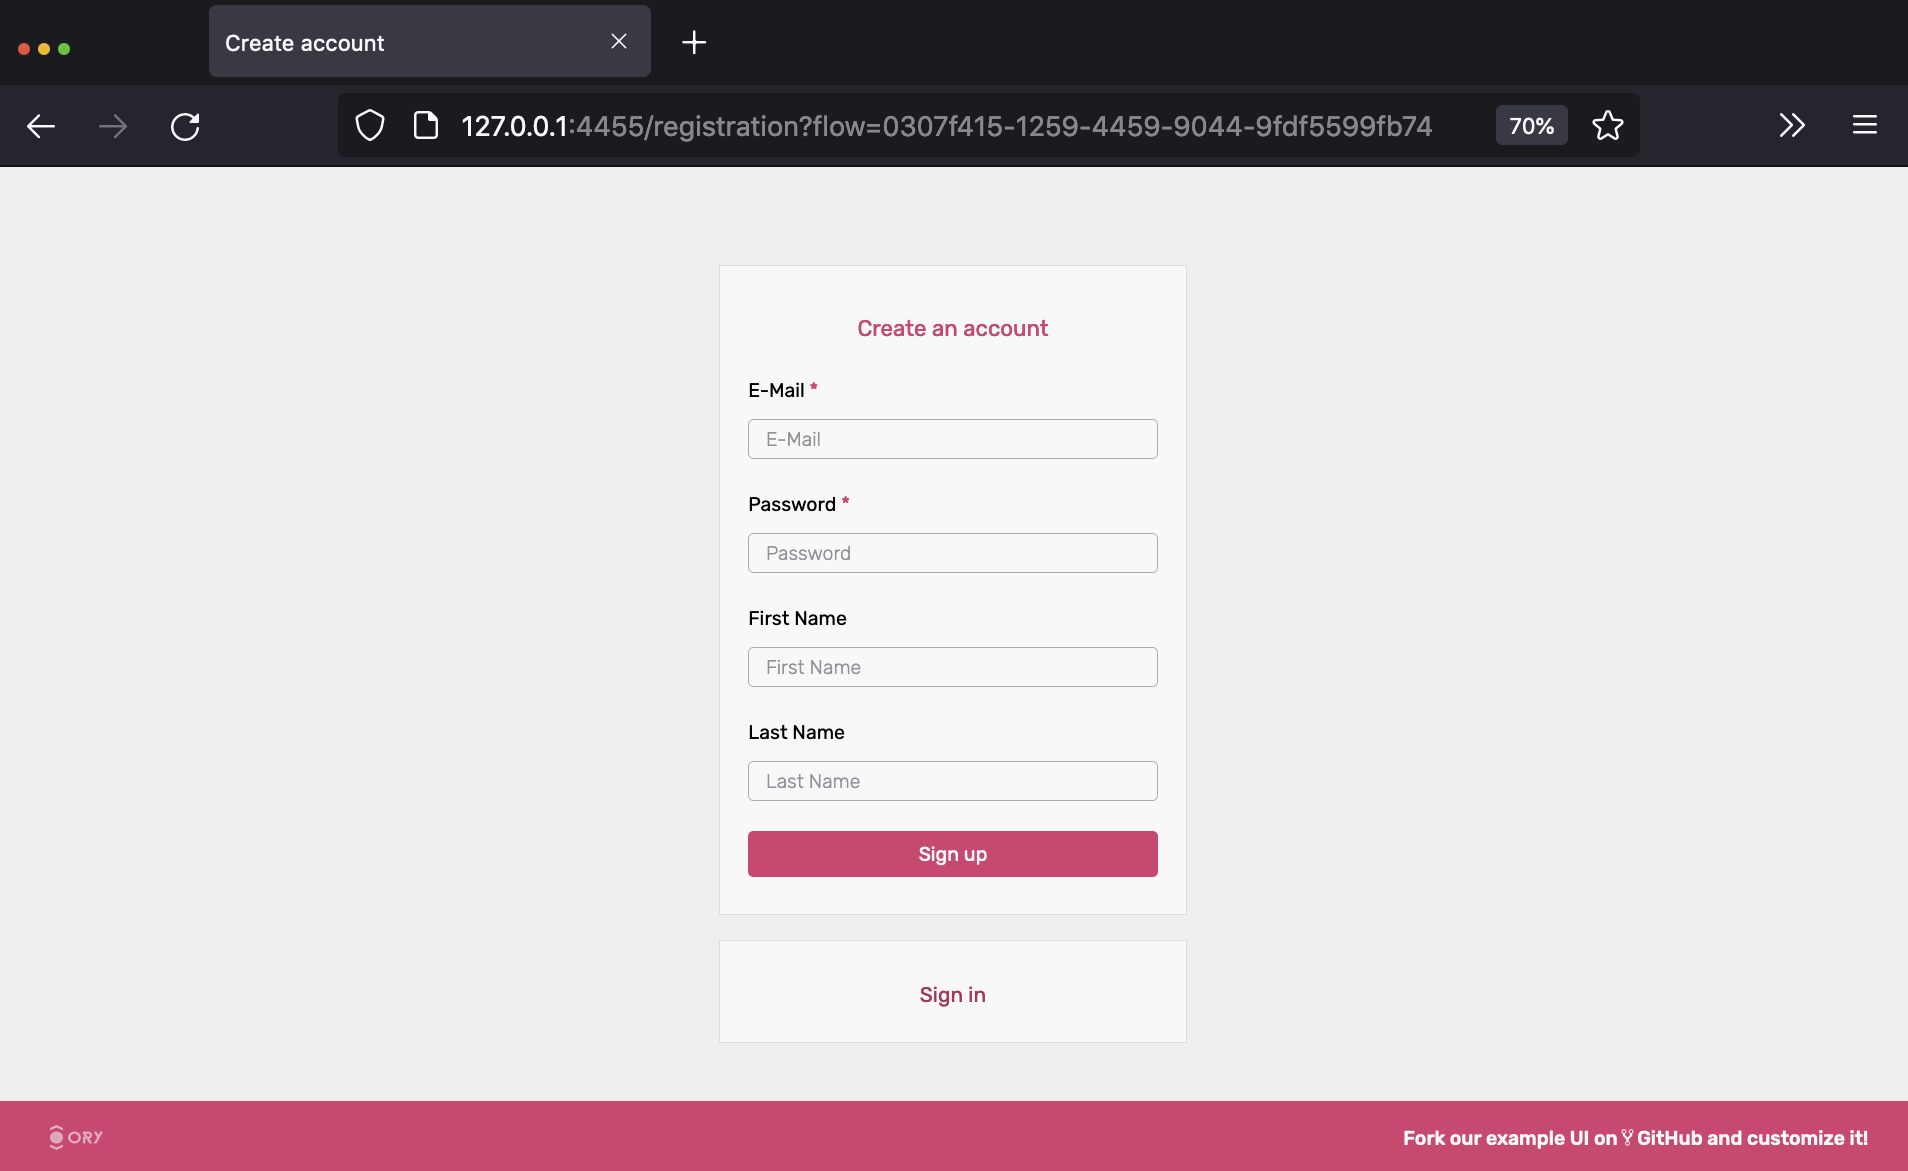
Let's move on to the next flow - registration! Click on "Register new account", which initiates a flow similar to the one we just used:
The network trace should look familiar by now:

To get an example of the payload for a registration flow, we can use the same curl request as above, now to the
self-service/registration endpoint.
flowId=$(curl -s -X GET \
    -H "Accept: application/json" \
    http://127.0.0.1:4433/self-service/registration/api | jq -r '.id')

curl -s -X GET \
    -H "Accept: application/json" \
    "http://127.0.0.1:4433/self-service/registration/flows?id=$flowId" | jq
{
  "id": "d62a3a8d-d3f3-4ca5-af54-0e8747b53b41",
  "type": "api",
  "expires_at": "2021-12-13T19:55:06.9350485Z",
  "issued_at": "2021-12-13T19:45:06.9350485Z",
  "request_url": "http://127.0.0.1:4433/self-service/registration/api",
  "ui": {
    "action": "http://127.0.0.1:4433/self-service/registration?flow=d62a3a8d-d3f3-4ca5-af54-0e8747b53b41",
    "method": "POST",
    "nodes": [
      {
        "type": "input",
        "group": "default",
        "attributes": {
          "name": "csrf_token",
          "type": "hidden",
          "value": "",
          "required": true,
          "disabled": false,
          "node_type": "input"
        },
        "messages": [],
        "meta": {}
      },
      {
        "type": "input",
        "group": "password",
        "attributes": {
          "name": "traits.email",
          "type": "email",
          "required": true,
          "disabled": false,
          "node_type": "input"
        },
        "messages": [],
        "meta": {
          "label": {
            "id": 1070002,
            "text": "E-Mail",
            "type": "info"
          }
        }
      },
      {
        "type": "input",
        "group": "password",
        "attributes": {
          "name": "password",
          "type": "password",
          "required": true,
          "disabled": false,
          "node_type": "input"
        },
        "messages": [],
        "meta": {
          "label": {
            "id": 1070001,
            "text": "Password",
            "type": "info"
          }
        }
      },
      {
        "type": "input",
        "group": "password",
        "attributes": {
          "name": "traits.name.first",
          "type": "text",
          "disabled": false,
          "node_type": "input"
        },
        "messages": [],
        "meta": {
          "label": {
            "id": 1070002,
            "text": "First Name",
            "type": "info"
          }
        }
      },
      {
        "type": "input",
        "group": "password",
        "attributes": {
          "name": "traits.name.last",
          "type": "text",
          "disabled": false,
          "node_type": "input"
        },
        "messages": [],
        "meta": {
          "label": {
            "id": 1070002,
            "text": "Last Name",
            "type": "info"
          }
        }
      },
      {
        "type": "input",
        "group": "password",
        "attributes": {
          "name": "method",
          "type": "submit",
          "value": "password",
          "disabled": false,
          "node_type": "input"
        },
        "messages": [],
        "meta": {
          "label": {
            "id": 1040001,
            "text": "Sign up",
            "type": "info",
            "context": {}
          }
        }
      }
    ]
  }
}
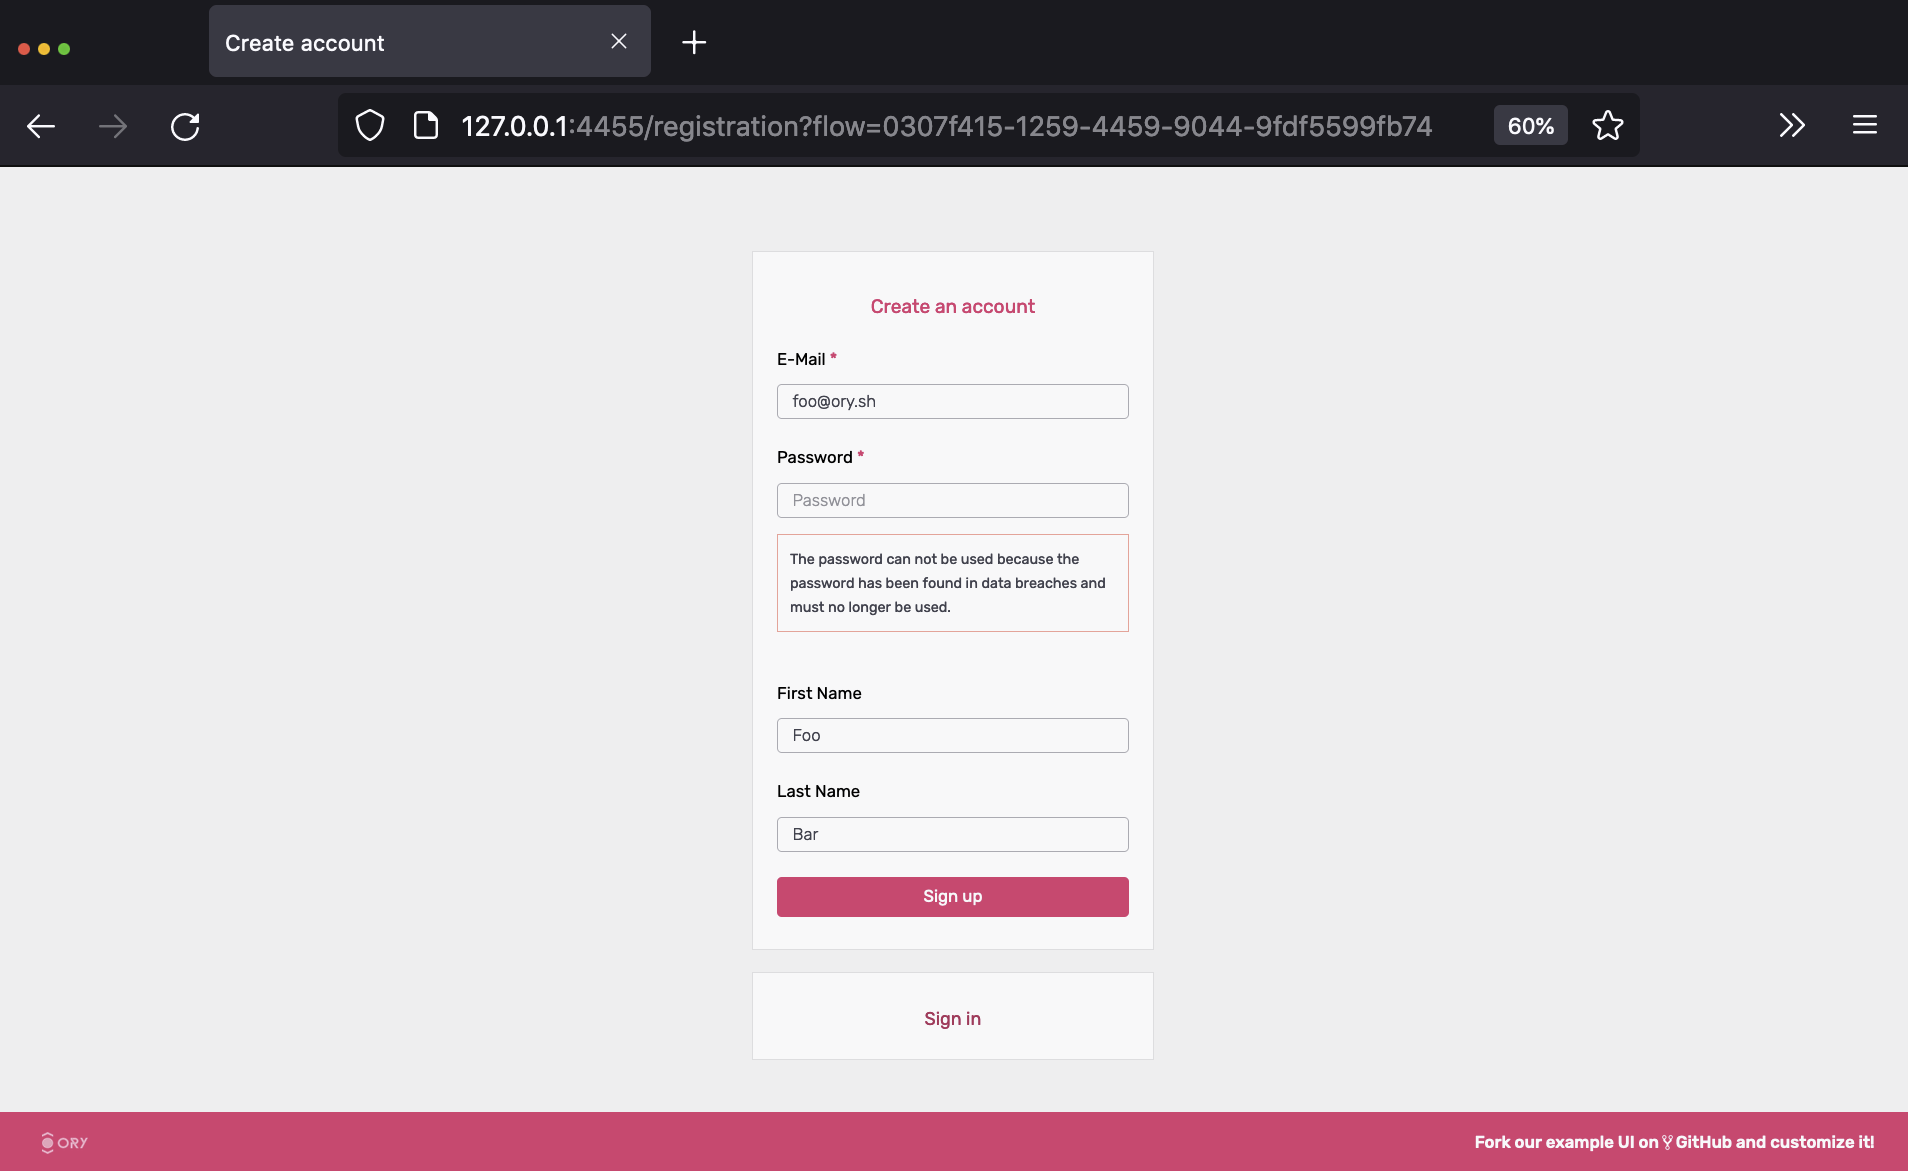
If we try to sign up using a password like 123456, Krato's password policy will complain:
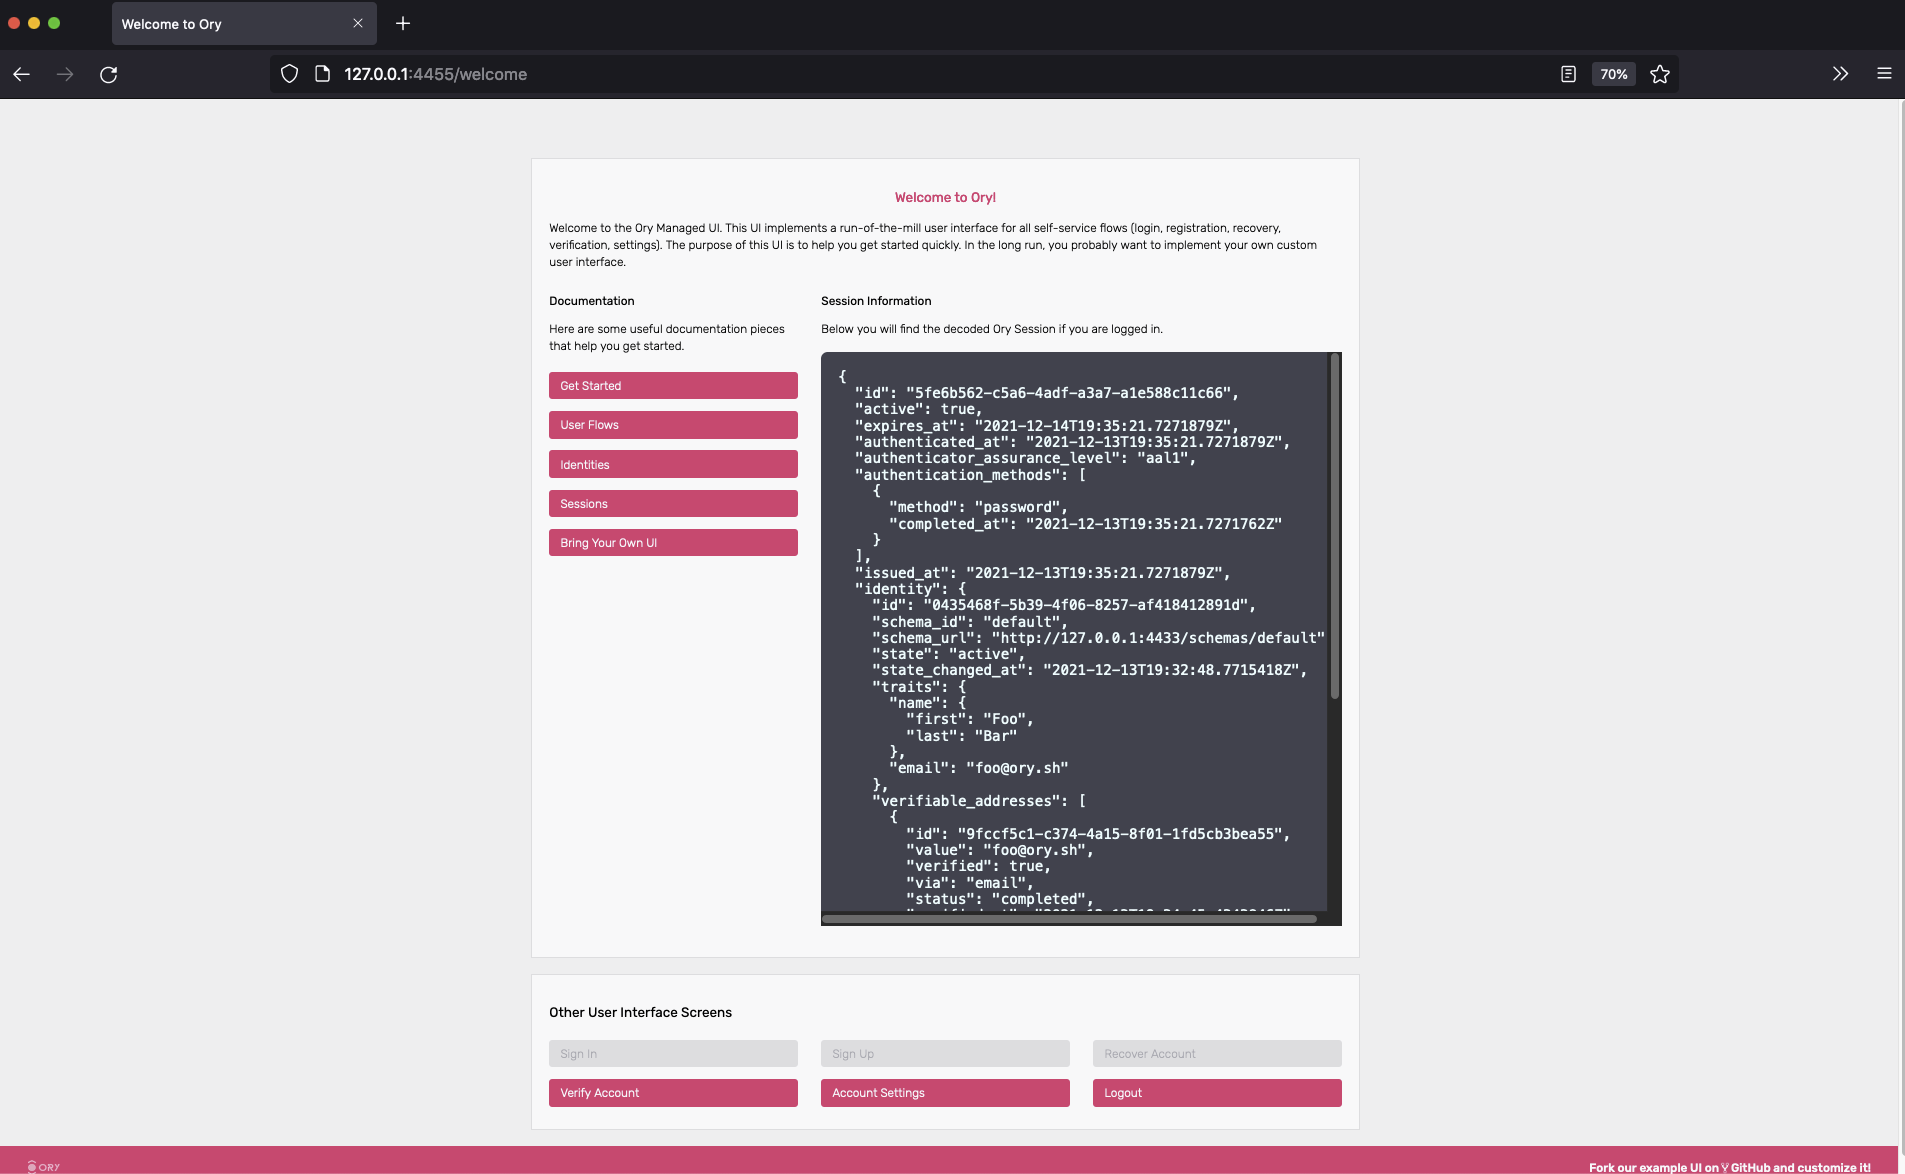
Setting a password that doesn't violate these policies, we will be immediately redirected to the dashboard:
By clicking the "logout" icon in the top right, you will be redirected to the login screen again where you will be able to use your credentials to log back in again. Exciting!
Understand how login and registration work
Head over to the Self-Service Flows Chapter for an in-depth explanation of how each individual flow works.
Email verification
As you've signed up, an email was sent to the email address you used. Because the quickstart uses a fake SMTP server, the email didn't arrive in your inbox. You can retrieve the email however by opening the MailSlurper UI at 127.0.0.1:4436.
You should see something like this:
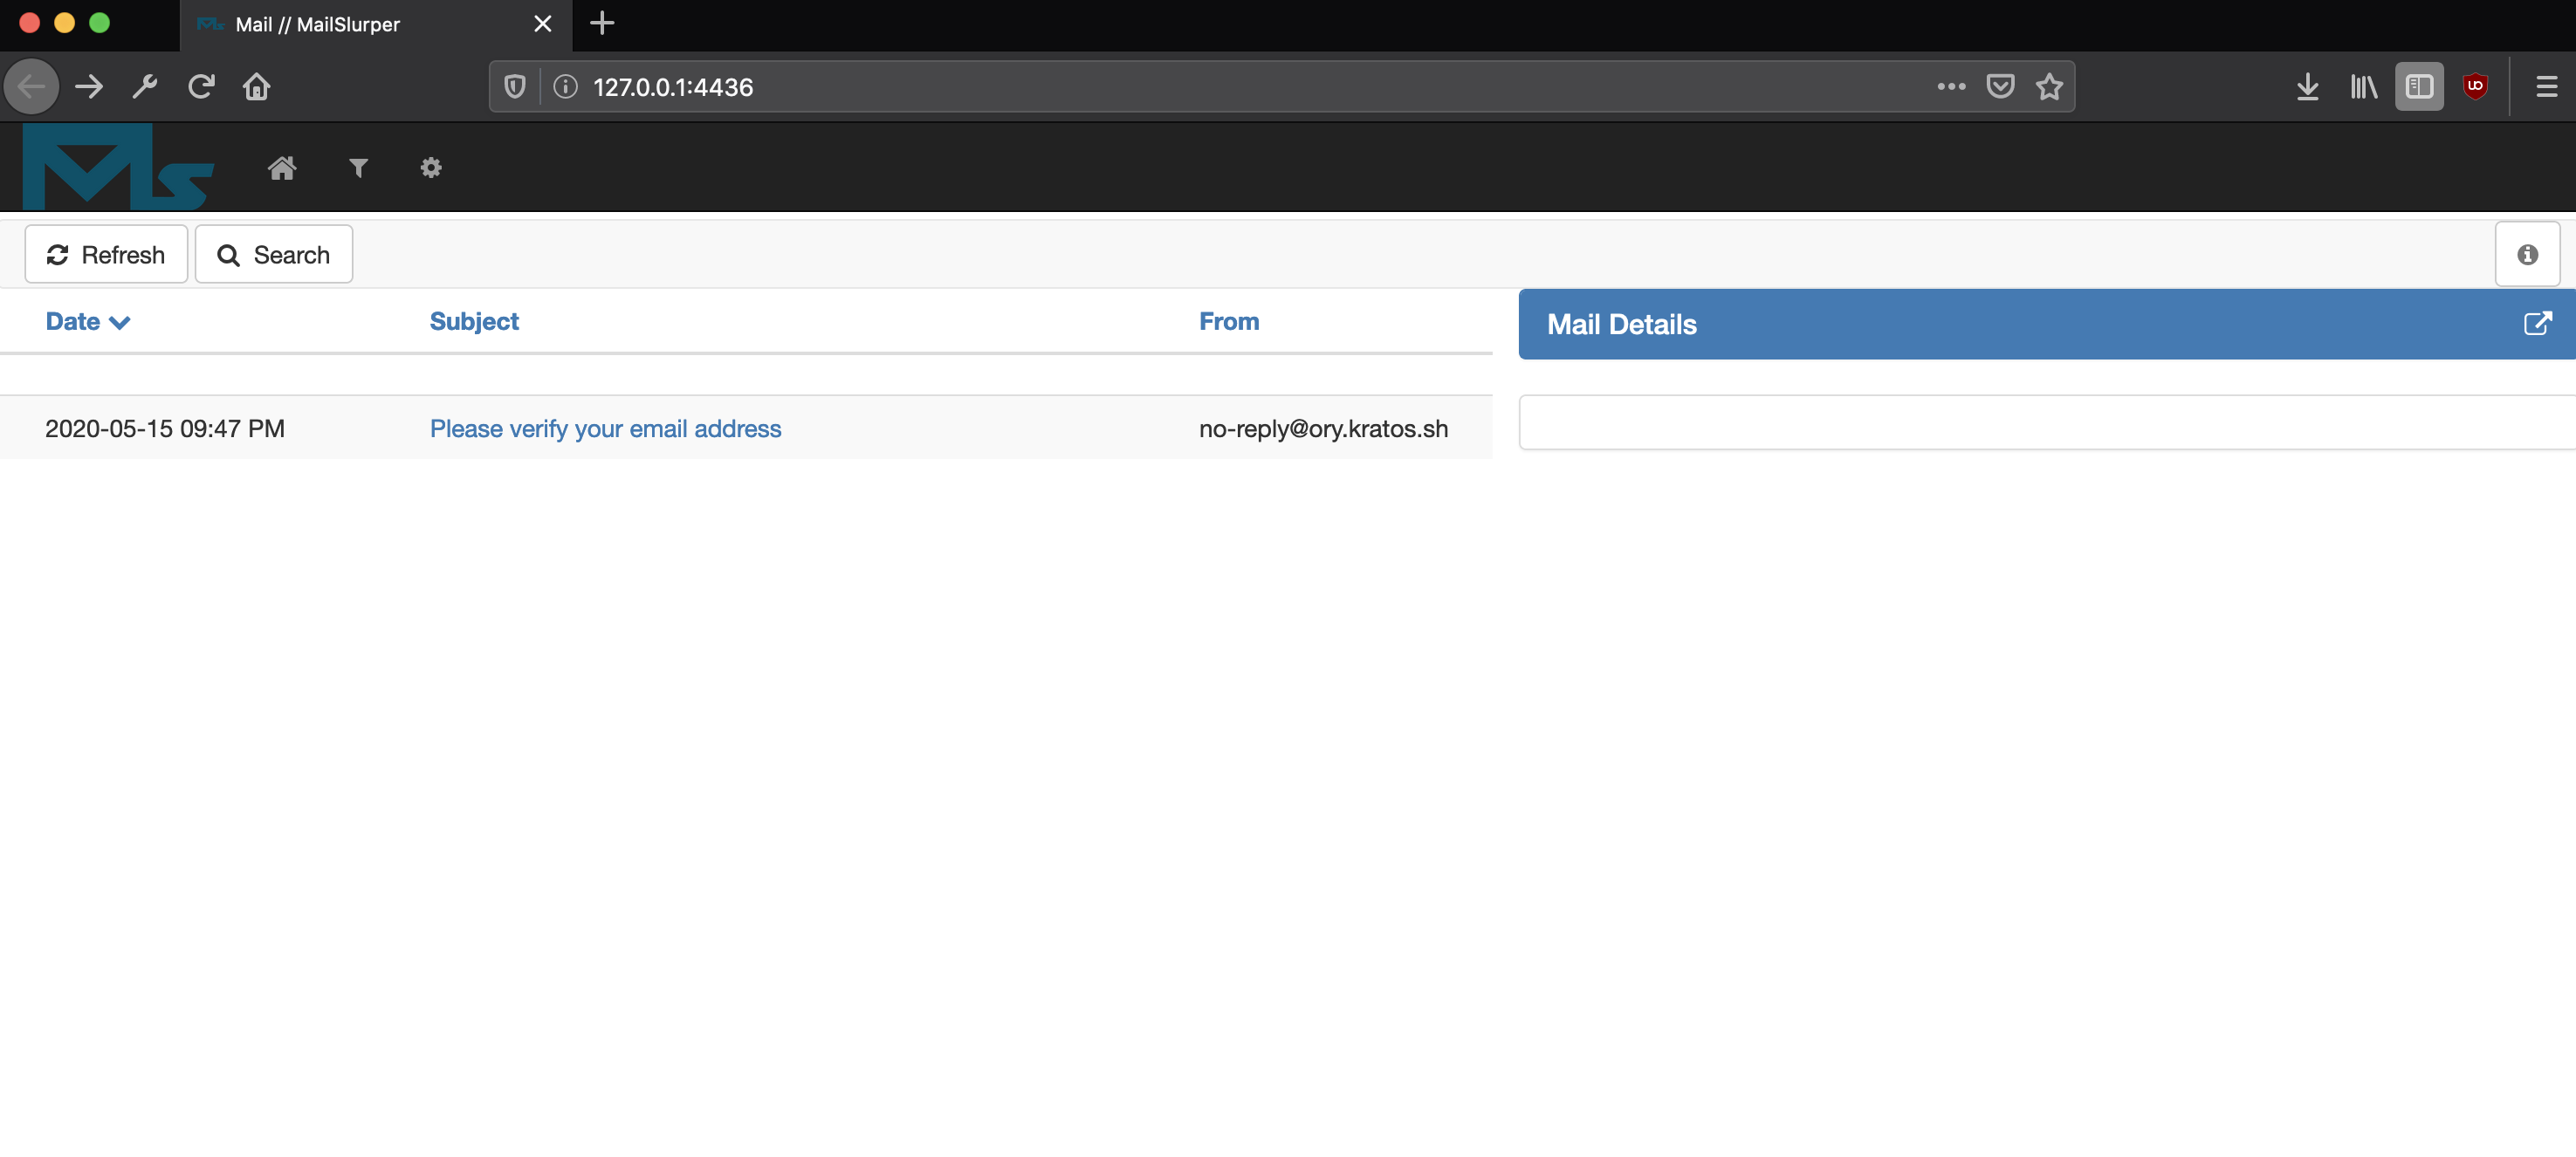
If not, hard refresh the tab or click on the home icon in the menu bar.
Next, click the verification link. You will end up at the dashboard, with a verified email address (check the verified and
verified_at field in the JSON response):
{
  "id": "5fe6b562-c5a6-4adf-a3a7-a1e588c11c66",
  "active": true,
  "expires_at": "2021-12-14T19:35:21.7271879Z",
  "authenticated_at": "2021-12-13T19:35:21.7271879Z",
  "authenticator_assurance_level": "aal1",
  "authentication_methods": [
    {
      "method": "password",
      "completed_at": "2021-12-13T19:35:21.7271762Z"
    }
  ],
  "issued_at": "2021-12-13T19:35:21.7271879Z",
  "identity": {
    "id": "0435468f-5b39-4f06-8257-af418412891d",
    "schema_id": "default",
    "schema_url": "http://127.0.0.1:4433/schemas/default",
    "state": "active",
    "state_changed_at": "2021-12-13T19:32:48.7715418Z",
    "traits": {
      "name": {
        "first": "Foo",
        "last": "Bar"
      },
      "email": "foo@ory.sh"
    },
    "verifiable_addresses": [
      {
        "id": "9fccf5c1-c374-4a15-8f01-1fd5cb3bea55",
        "value": "foo@ory.sh",
        "verified": true,
        "via": "email",
        "status": "completed",
        "verified_at": "2021-12-13T19:34:45.4343846Z",
        "created_at": "2021-12-13T19:32:48.775138Z",
        "updated_at": "2021-12-13T19:34:53.449022Z"
      }
    ],
    "recovery_addresses": [
      {
        "id": "0df6ddf6-780b-4c3c-ba31-4a349a2a1bc5",
        "value": "foo@ory.sh",
        "via": "email",
        "created_at": "2021-12-13T19:32:48.775823Z",
        "updated_at": "2021-12-13T19:34:53.449207Z"
      }
    ],
    "created_at": "2021-12-13T19:32:48.773627Z",
    "updated_at": "2021-12-13T19:32:48.773627Z"
  }
}
To re-request the verification email, fill out the form at 127.0.0.1:4455/verification.
To learn more about verification recovery, head over to the Email and Phone Verification and Account Activation Documentation.
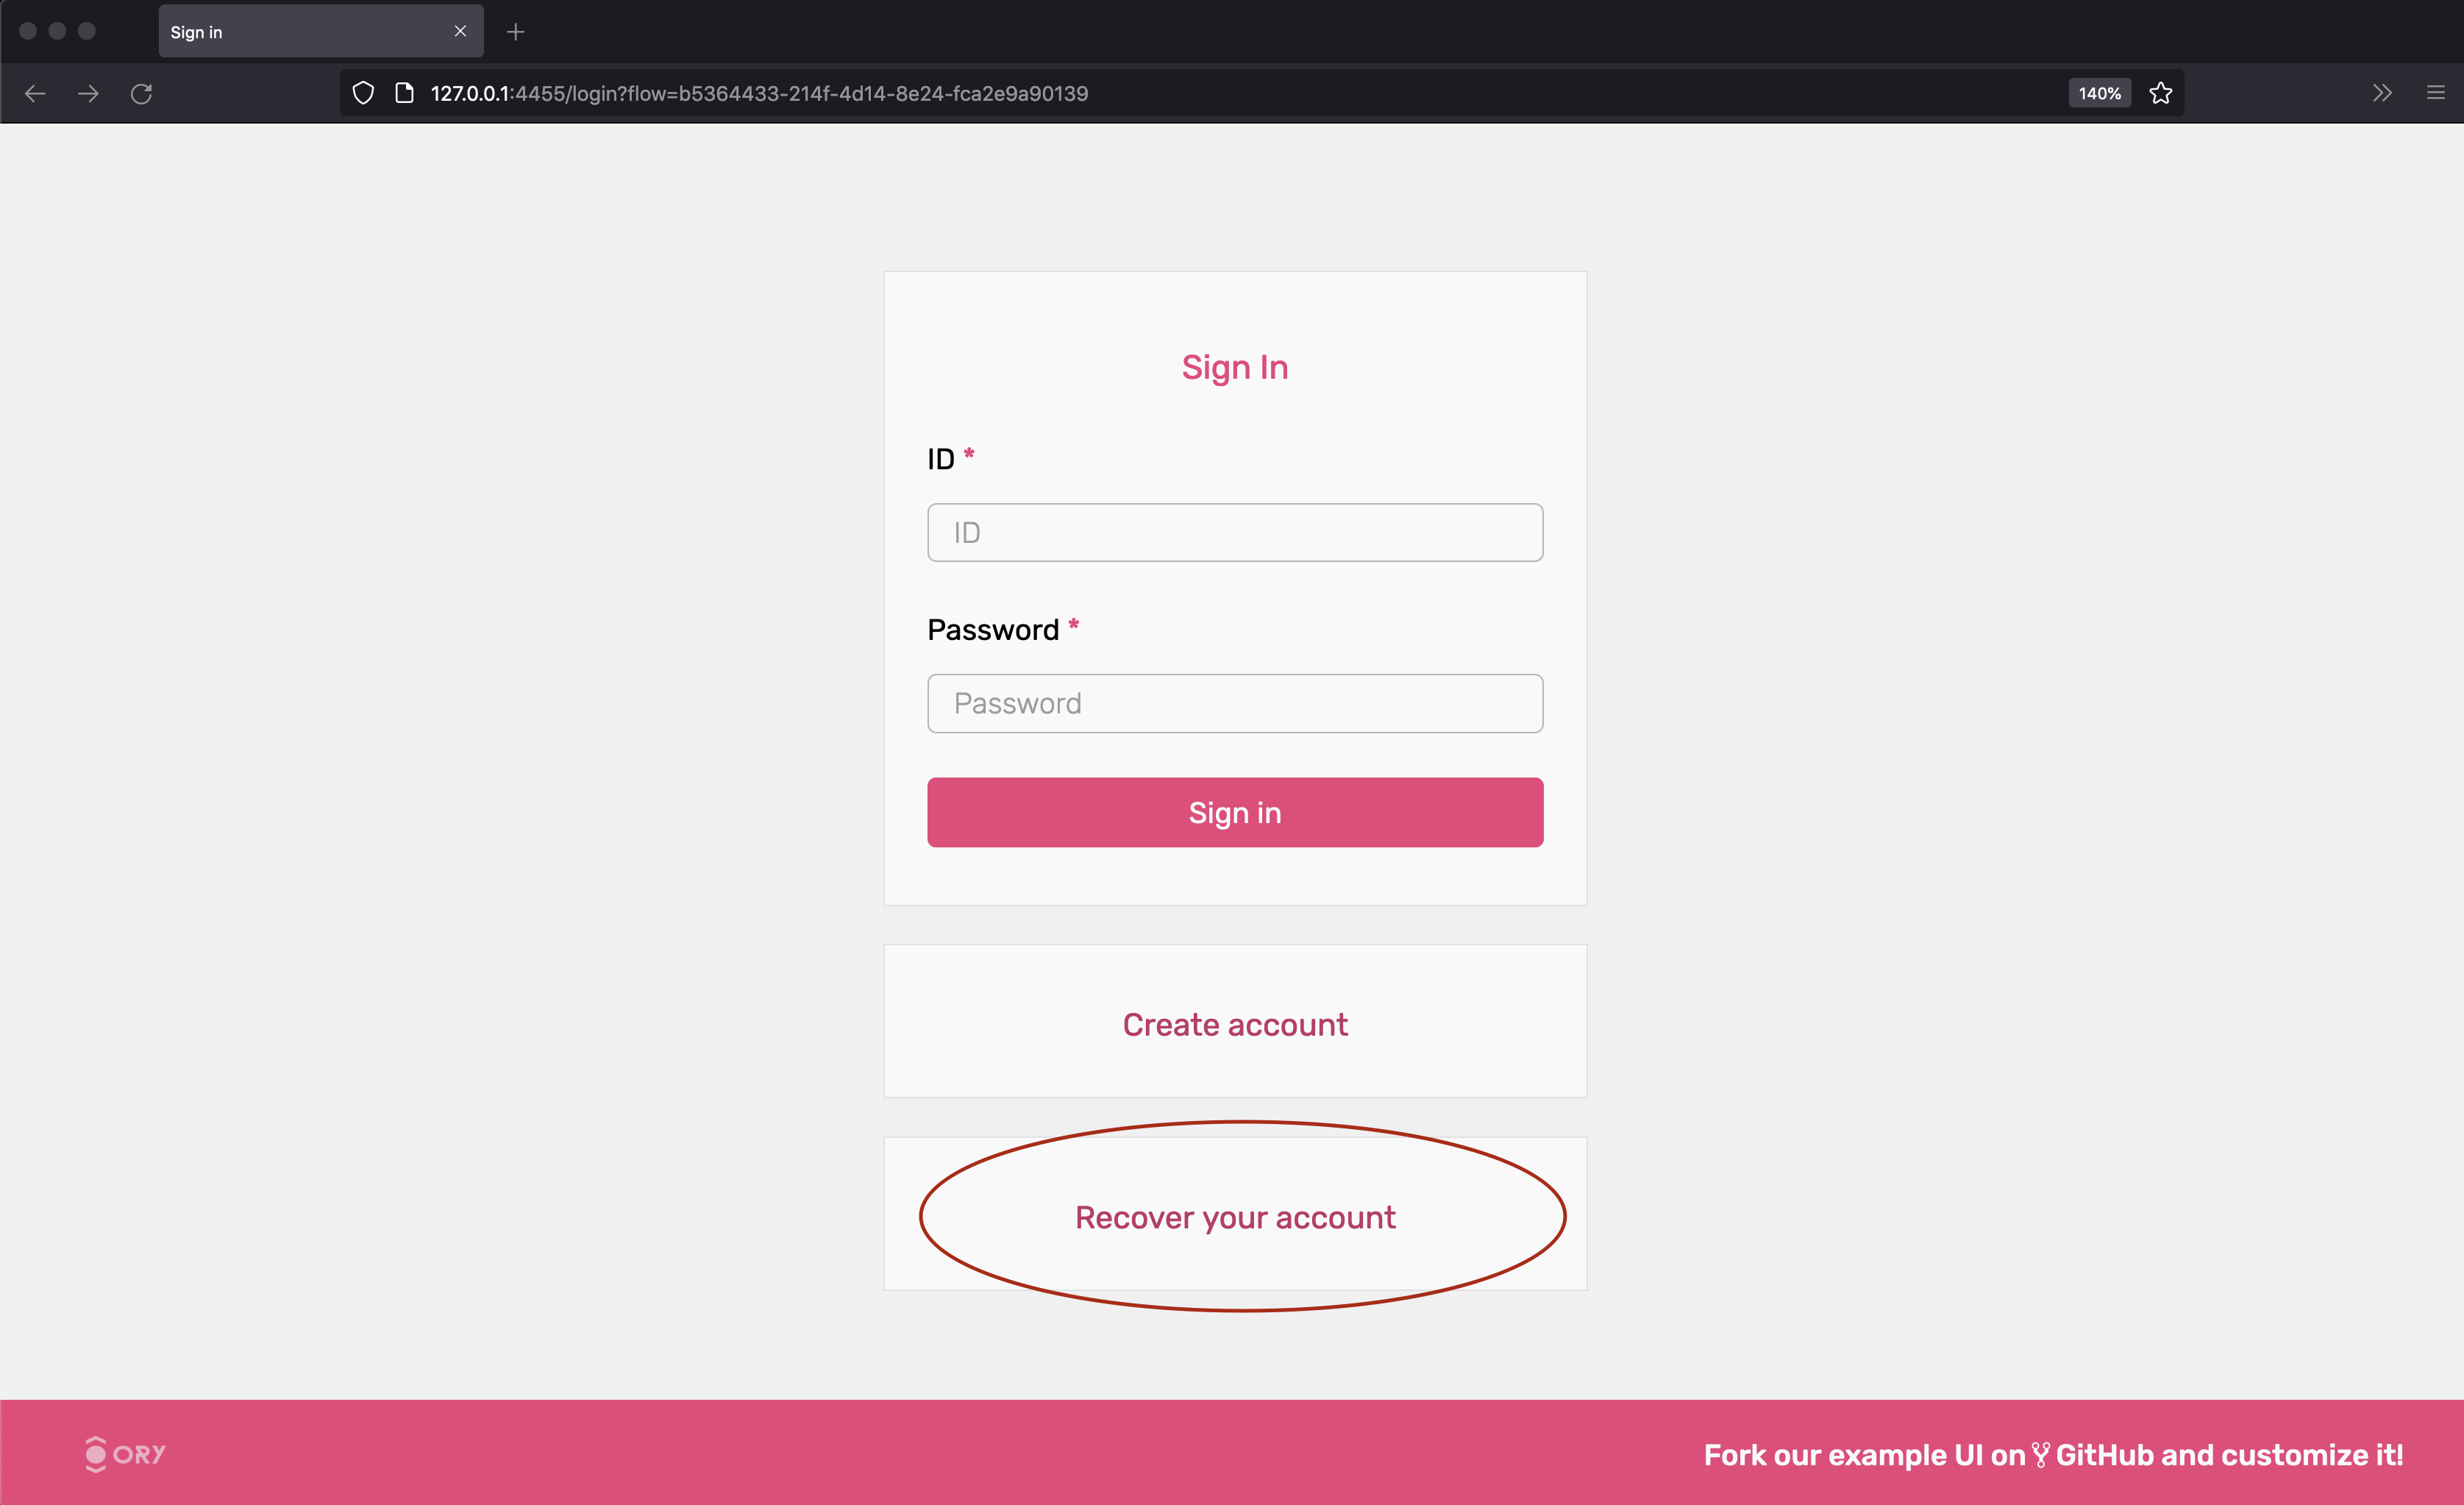
Account recovery
The quickstart has account recovery enabled. To recover an account, log out and click on "Recover Account":
The next screen shows a HTML form where you enter your email address:

Hit "submit" and check the emails for the account recovery message:
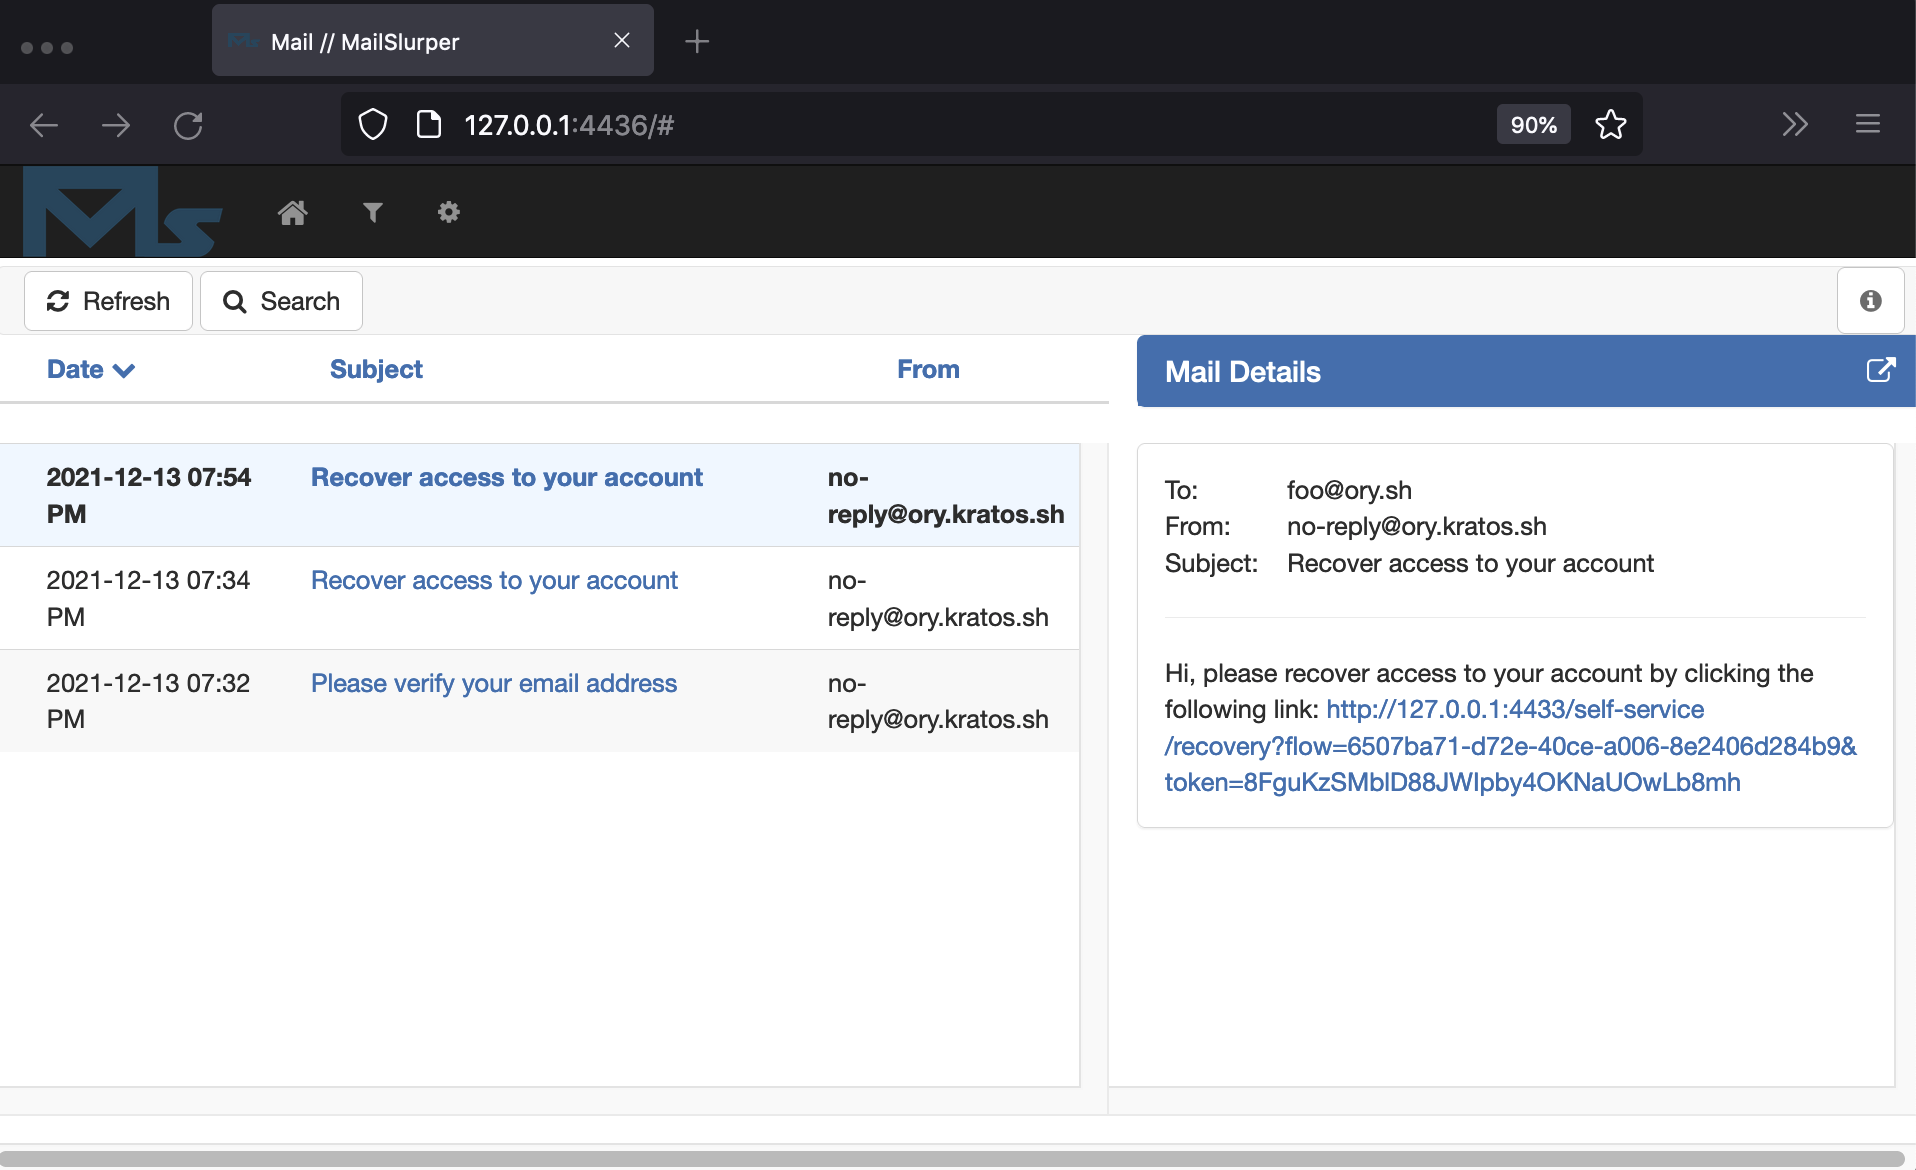
Click the link, and change your password:
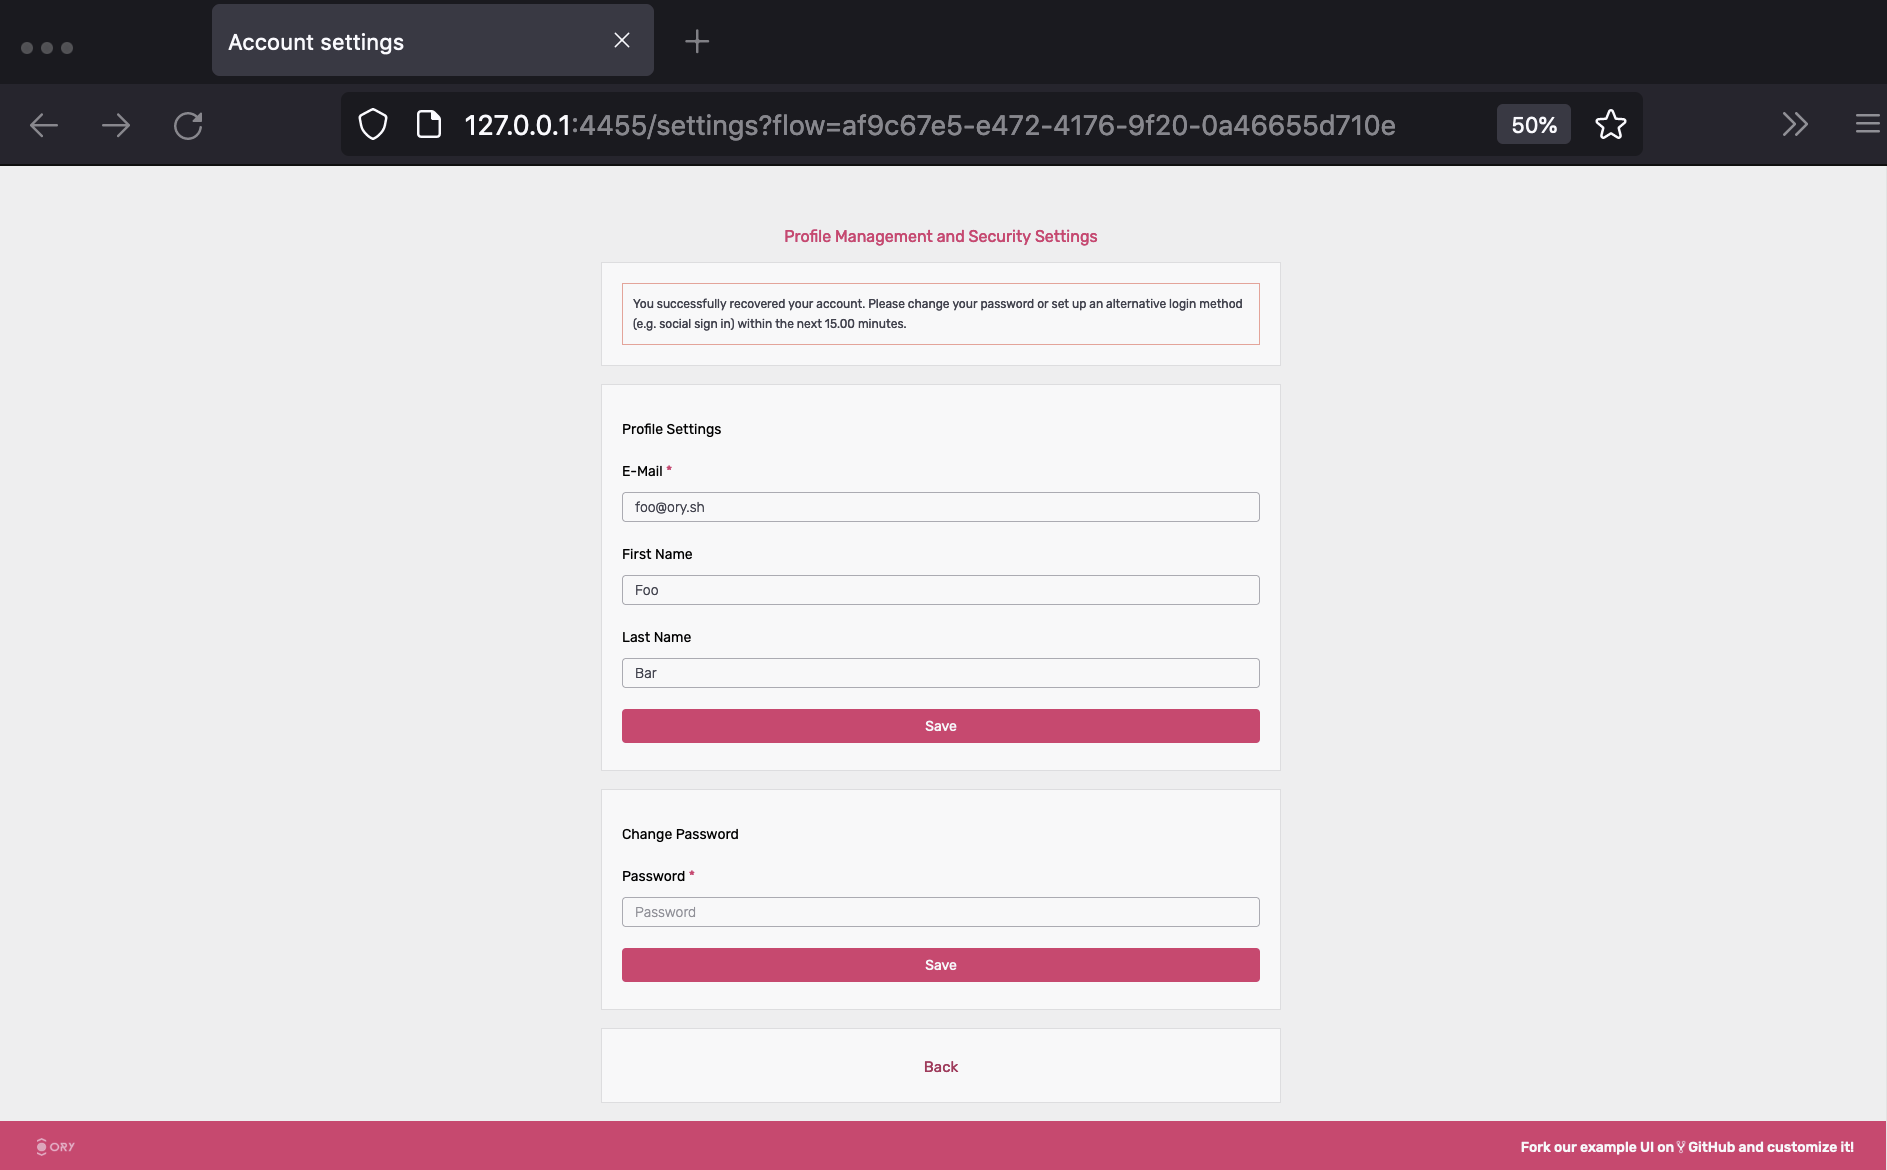
You are now able to sign in with the new password. To learn more about account recovery, head over to the Account Recovery Documentation.
Configuration
You can find all configuration files used for this quickstart guide in
./contrib/quickstart/kratos ,
./quickstart.yml, and
./quickstart-standalone.yml. To understand what each of
those configuration files does, consult the other chapters of this documentation.
To get a minimal version of Ory Kratos running, you need to set configuration values for
identity.default_schema_id
and DSN. You should also configure
selfservice.flows.*.ui_url
or else Kratos will use fallback URLs.
This is just scratching the surface of Ory Kratos, see Next Steps for pointers how to continue.
Cleaning up Docker
To clean everything up, you need to bring down the Docker Compose environment and remove all mounted volumes.
docker-compose -f quickstart.yml down -v
docker-compose -f quickstart.yml rm -fsv
Next steps
Here is some information should you want to modify the quickstart:
Social Login
Step-by-step guides to add sign up and login with popular OIDC providers to the Ory Kratos Quickstart, for example:
Use a different database
If you want to run the quickstart with PostgreSQL, run the following docker-compose:
docker-compose -f quickstart.yml -f quickstart-standalone.yml -f quickstart-postgres.yml up --build --force-recreate
If you want to run the quickstart with CockroachDB, run the following docker-compose:
docker-compose -f quickstart.yml -f quickstart-standalone.yml -f quickstart-crdb.yml up --build --force-recreate
If you want to run the quickstart with MySQL, run the following docker-compose:
docker-compose -f quickstart.yml -f quickstart-standalone.yml -f quickstart-mysql.yml up --build --force-recreate
Change ports
If you want to change ports for the SelfService-UI, you need to change them in quickstart.yml as well as in the
contrib/quickstart/kratos/email-password/kratos.yml accordingly.
Note that you also need to change the ports for flows (error, settings, recovery, verification, logout, login, registration).
The same procedure applies if you want to change ports for the Public UI/Admin UI or the Mailslurper.
Hooks
To change the redirects happening after registration,login or a settings change, take a look at this document: Hooks.
If you delete the session hook from kratos.yml, the user will not be immediately signed in after registration.
Quickstart configuration
In this tutorial we use a simplified configuration. You can find it in
contrib/quickstart/kratos/email-password/kratos.yml.
In the same place the
identity schema used in
the tutorial can be found. The configuration gets loaded in docker-compose as specified in the
quickstart.yml.
Have a look at the reference configuration for further information on possible configuration options.